Posted on

Photo(s) of the Week: A Most Distinctive Wall


Ian Henderson and Daniel Beck with tile installation
Ian Henderson and Daniel T. Beck with the nearly-completed tile installation in Penland’s new core house.

Way back in 2012, Penland School was planning a new house for its core fellows: those energetic and committed artists who live and work at Penland–taking classes and doing work for the school–for two years. They amaze us, we fall in love with them, and they move on to other things. Fortunately, as illustrated in this picture, some of them move on to things that keep them at Penland.

The design for the new house, by architect Louis Cherry, includes a feature called a trombe wall, which is a dark-colored masonry wall that collects and radiates solar heat in the winter. Jean McLaughlin, who was Penland director at that time, along with the design committee for the project proposed that this wall should also be an artist-generated design feature.

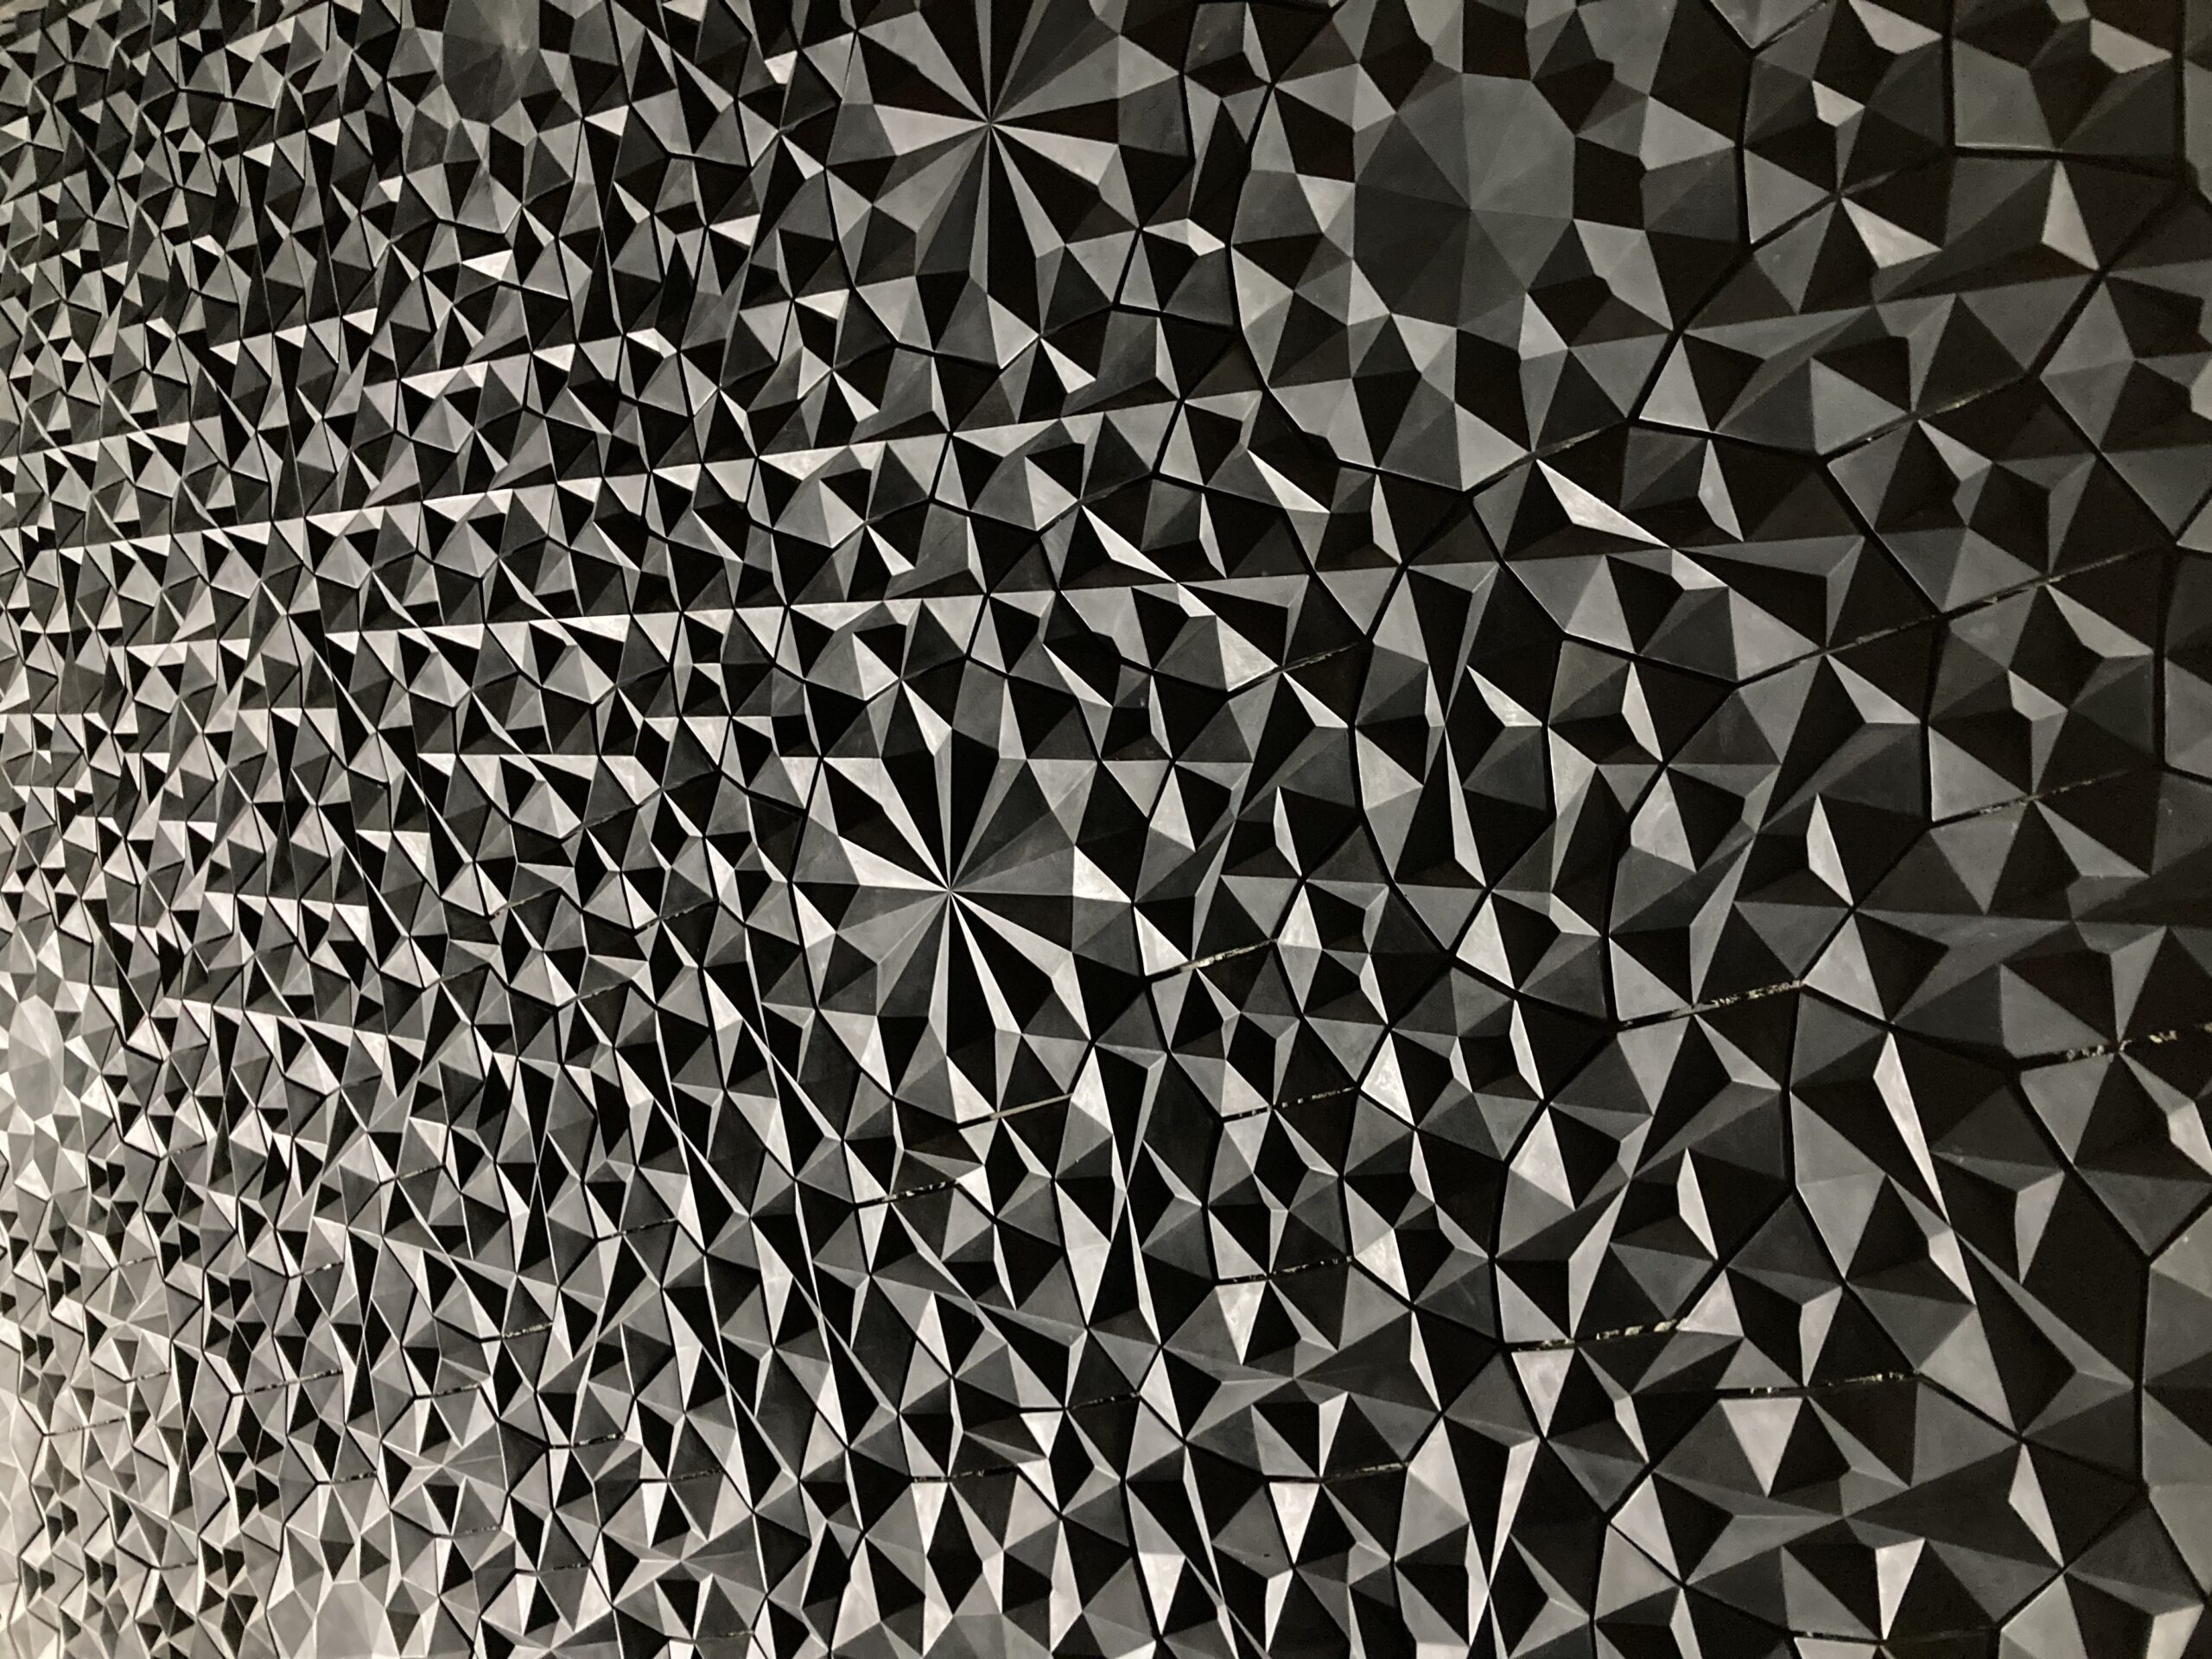
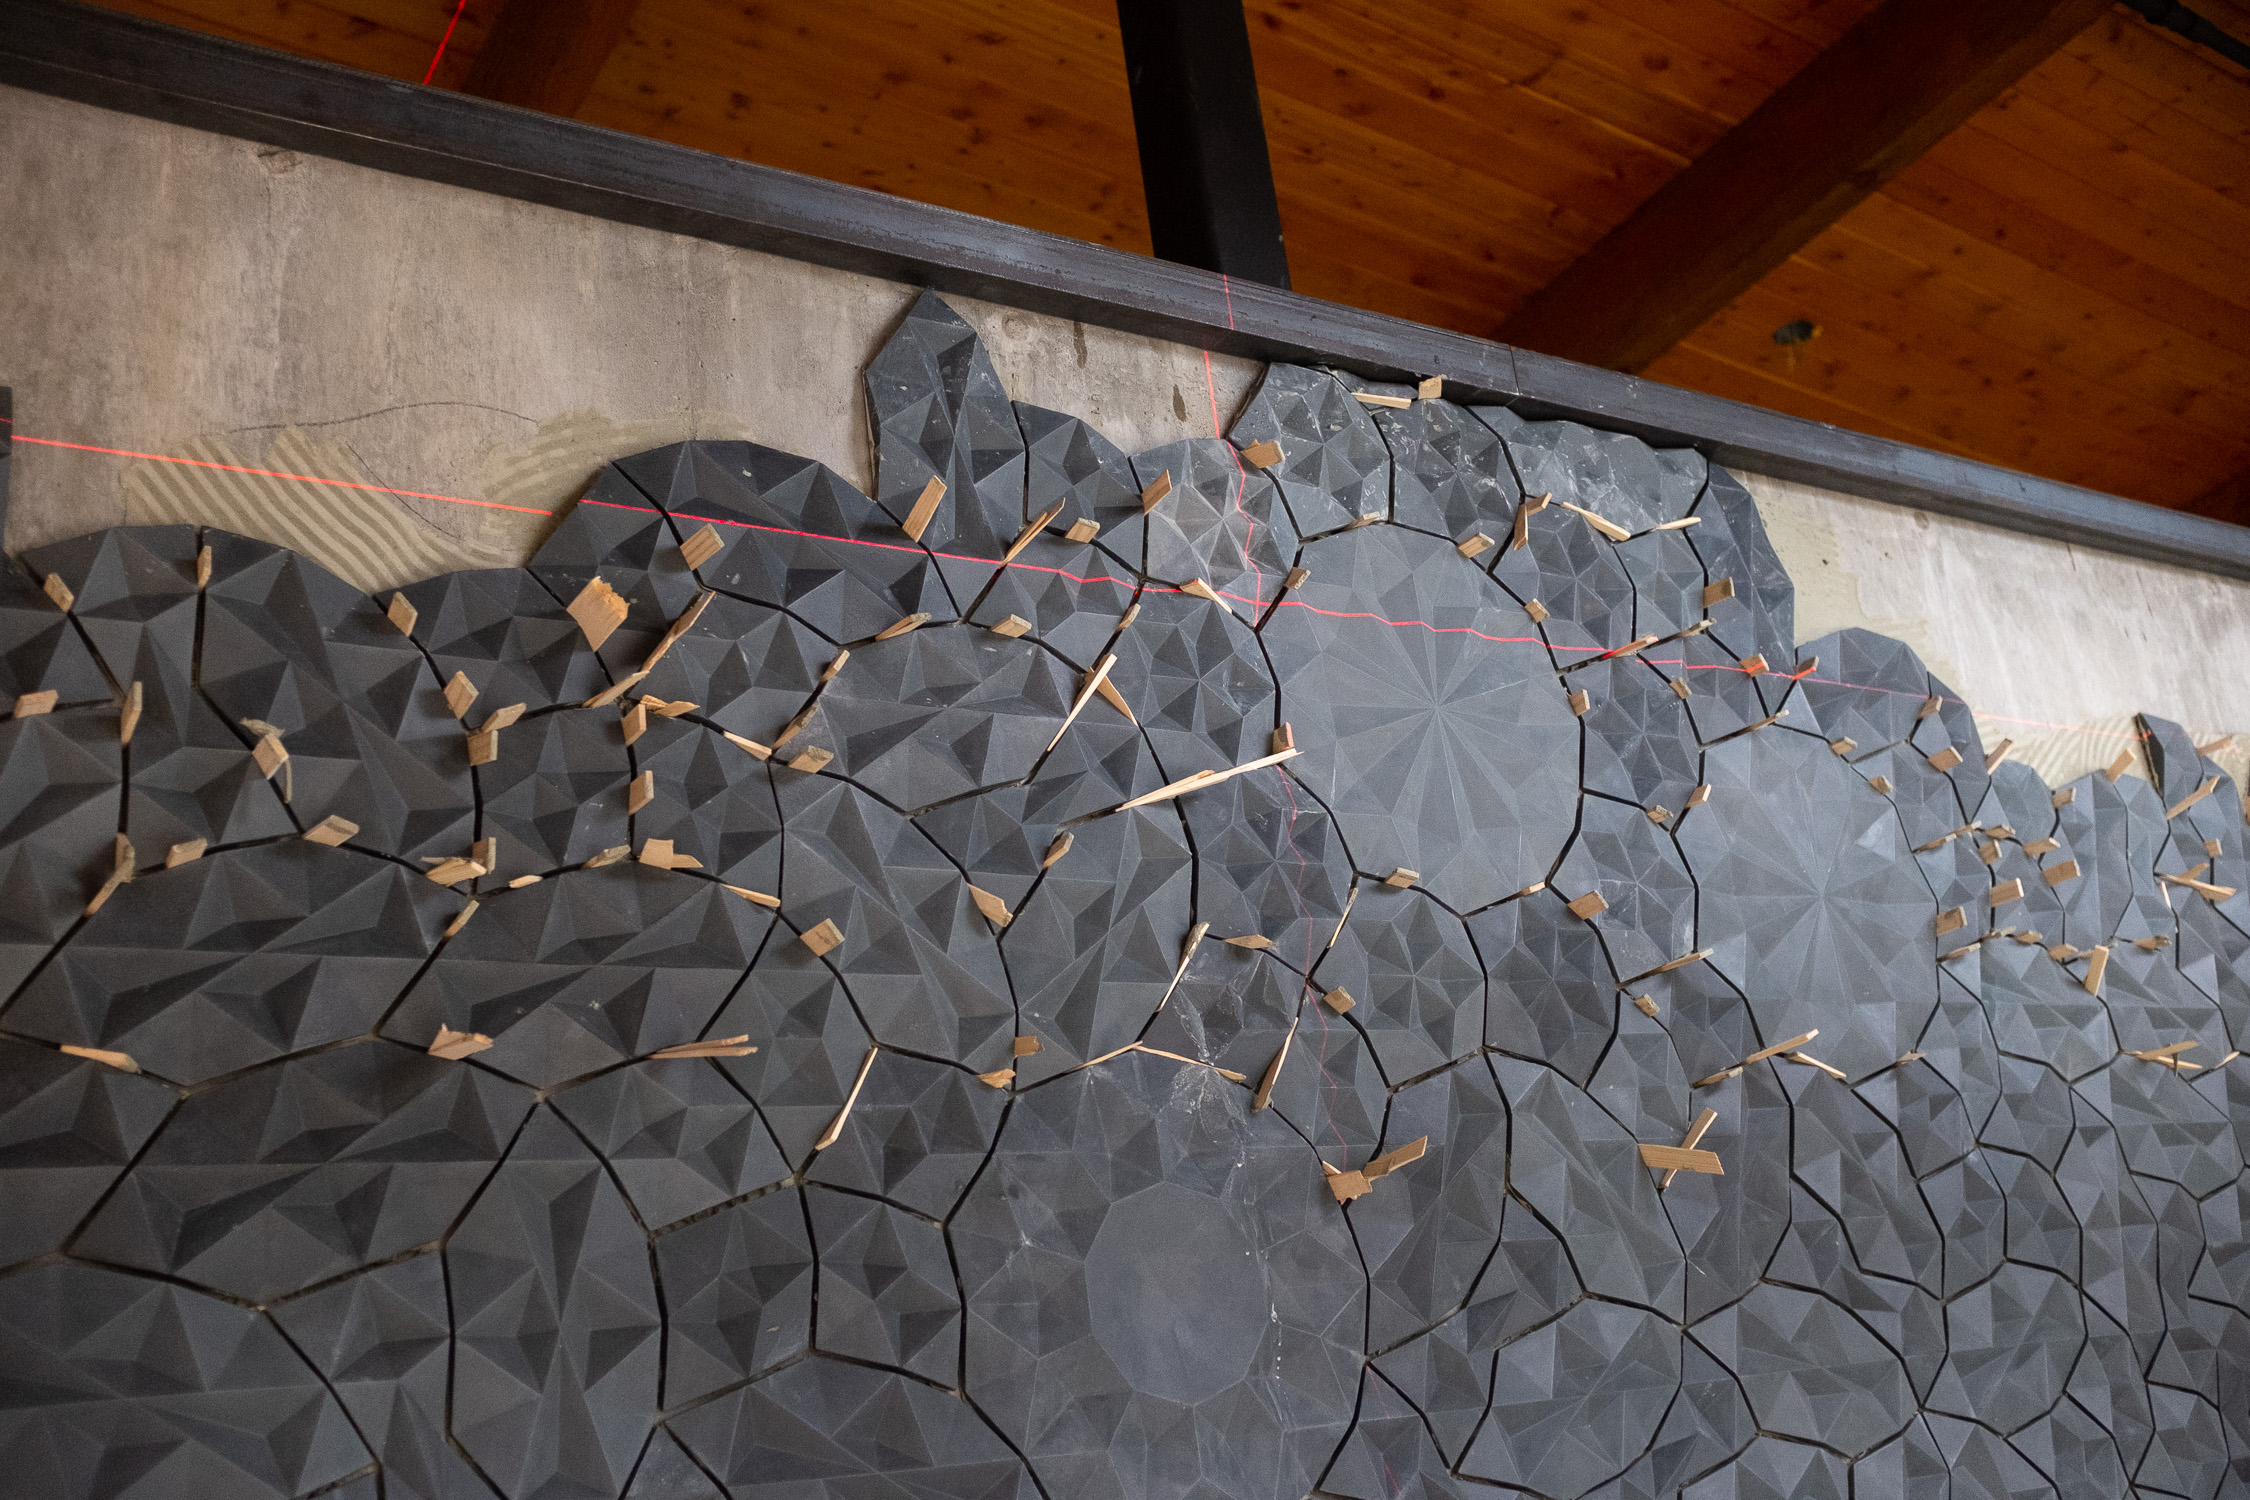
The artist selected was Ian Henderson, who had completed the core fellowship earlier that year. Ian is a bit obsessive about pattern, and he had done quite a bit of slip casting while he was in the core program. Out of those interests grew a proposal for a relief tile installation with an underlying design based on a set of shapes known a girih tiles, which are the basis for a centuries-old system of ornamentation used throughout the Middle East. Ian readily points out that it is a derivative design. “Plenty of people before me have been exploring these same shapes and patterns. If the design for this installation is innovative, it is in the creation of a topography for each tile that is made up of triangular facets.”

Ian Henderson and Daniel Beck working on tile installation
Ian and Daniel at work; no masks because they decided to “pod up” for the duration of the project.

With able assistance from fellow core alumni Daniel T. Beck, Andrew Hayes, and Mark Warren, Ian made about 1,000 ceramic tiles during a 2013 residency at the Kohler factory in Wisconsin. He documented that residency in a fascinating blog that covers both the design process and the making of the tiles. At the end of three months, the tiles were packed up and shipped to Penland where they were put into storage to wait for the house to become a reality.

Tile wall installation
How do you keep something like this aligned? Laser levels are especially helpful.

This took a little while. Construction at Penland always waits for fundraising, and then it takes as long as construction takes. Fast forward to February of this year, and the house had finally reached a stage where the tiles could be installed. Ian Henderson is now Penland’s director of operations, and Daniel Beck has been iron studio coordinator for almost a decade. Their plan had always been to install the tiles together when the time came, and when the time came, they were both working at Penland.

The wall sits just inside the front entrance where future generations of core fellows will walk past it as they retreat to their lovely house for some much-deserved rest or head up to campus to work on some equally ingenious project.

————–

In the time since the Kohler residency, Ian has also created a concrete-tile installation with students in Guanajuato, Mexico and another for the Center for Craft in Asheville, North Carolina.

If you would like to learn more about girih tiles, they are beautifully explained in this lecture by Peter Lu, whose work has greatly increased contemporary understanding of the system.

tile wall installation
The installation looks especially fabulous at night with some raking light on it.

Posted on

Photo(s) of the Week: From Bag of Clay to Handled Tray

This Saturday, we’re thrilled to welcome Courtney Martin back to the Penland clay studio for our third Penland Everywhere live Q&A!

These live events are part of our very first online programs and go hand-in-hand with prerecorded video demonstrations featuring a handful of expert instructors sharing their techniques, tips, and tricks. If Courtney’s Q&A is anything like our first two with Cristina Córdova and David H. Clemons, it will be an hour packed with useful insights, detailed information, and a bit of that Penland camaraderie we’ve all been missing. Sign up now to join the conversation—the Q&A starts at 1 PM ET tomorrow, February 20.

Courtney’s demo takes participants through her steps for creating a handbuilt tray form, complete with her signature cut handles and decorative carving details. Here’s a look at the process in three screenshots taken directly from her hour-long lesson.

15:04—Join the two ends of the coil that will form the walls of the tray.

Potter Courtney Martin in the early stages of making a tray in the Penland clay studio


41:32—Mark out the handle openings on the refined tray form.

Courtney Martin marking her tray form with a needle tool


59:03—Give the foot of the tray some personality with decorative carving!

Courtney Martin uses a loop tool to carve a geometric pattern into the underside of her clay tray


Participants in Courtney’s demo will have 30 days of access to watch, rewatch, and try out her techniques. Register now to give it a try!

For a deeper dive into handbuilding with clay, sign up to join Courtney’s immersive online workshop March 11-13.

Posted on

Photo of the Week: Process in Pewter

We launched the videos for our second online demonstration this week! Participants have been following along as expert metalsmith David Clemons forms, welds, solders, and finishes an elegant pewter salt shaker. And this Saturday, 2/13, they’ll get to join David for a live Q&A to learn more about his process and get answers to their metalsmithing questions.

Register for David’s demo to take part!

Here’s a small window into the transformation a flat sheet of metal undergoes in David’s hands. Each of the following images is a screenshot taken directly from his prerecorded demonstration.

1. Transferring the vessel template to sheet metal

metalsmith David Clemons introducing pewter in his online demonstration


2. Joining the edges of the pewter into a tapered cylinder

Instructor David Clemons joining two edges of a pewter vessel


3. Soldering the base of the salt shaker to the body of the vessel

David Clemons soldering the base to a vessel in the Penland metals studio


4. Showing off the finished piece—shiny and ready for a place at the table!

David Clemons with his completed pewter salt shaker at the end of his online demo


David will also be teaching an immersive online workshop on making lidded pewter vessels February 24-27. Register now, or explore all Penland’s upcoming workshops online and in person.